
Have you ever found yourself scraping the last drops of store-bought vanilla extract, wishing for something richer, more aromatic, and just a little more magical? If so, this vanilla paste recipe might just be your new kitchen obsession.
Made with real vanilla beans and simple pantry ingredients, homemade vanilla paste delivers that deep, floral-sweet flavor you love—only better. It’s a natural vanilla extract alternative that adds visible flecks of vanilla to your desserts, from silky custards to fluffy cakes and even your morning coffee.
I’ve fallen in love with making my own, and once you try it, I think you’ll wonder why you ever settled for anything less. Let’s dive into this DIY vanilla flavoring that’s as versatile as it is irresistible.
Table of Contents
Table of Contents
Key Benefits of Making Your Own Vanilla Paste
There’s something incredibly satisfying about creating your own vanilla paste—not just for the flavor, but for the quality, flexibility, and joy it brings to your baking. If you’ve never tried making it from scratch, here’s why it’s absolutely worth it:
1. Richer, More Intense Flavor
Unlike store-bought options, homemade vanilla paste uses real vanilla beans, giving you a deeper, more nuanced taste. Plus, those beautiful black specks? They’re actual vanilla seeds—tiny treasures that elevate any dessert from basic to bakery-worthy.
2. Cost-Effective in the Long Run
High-quality vanilla extract and commercial pastes can be expensive, especially if you bake often. Making your own lets you stretch every bean, especially if you buy in bulk or repurpose used pods. It’s an investment that pays off with every batch of cookies or custard.
3. Pure and Customizable
Tired of labels with mystery ingredients? With homemade vanilla paste, you’re in control.
Choose alcohol-free options, swap in natural sweeteners, or adjust the texture and strength to suit your needs. It’s the ultimate natural vanilla extract alternative—made exactly how you like it.
4. Perfect for a Range of Recipes
This paste isn’t just for show—it shines in everything from baked goods to beverages:
- Whip it into buttercream frosting
- Stir into yogurt or smoothies
- Add to ice cream bases
- Use in custards, puddings, and crème brûlée
Once you start using vanilla bean paste instead of extract, you’ll notice the difference—and you might not go back.
5. A Joyful DIY Kitchen Skill
There’s something special about making an essential ingredient with your own hands. It feels a little indulgent, a little old-fashioned—in the best way. Whether you’re a seasoned baker or just love experimenting, this is one of those small skills that brings big rewards.
Ingredients for Homemade Vanilla Paste
Let’s talk ingredients! The beauty of this vanilla paste recipe is in its simplicity. You don’t need anything fancy—just a few key components to create a rich, fragrant, and versatile paste that’ll upgrade everything from pancakes to pastries.
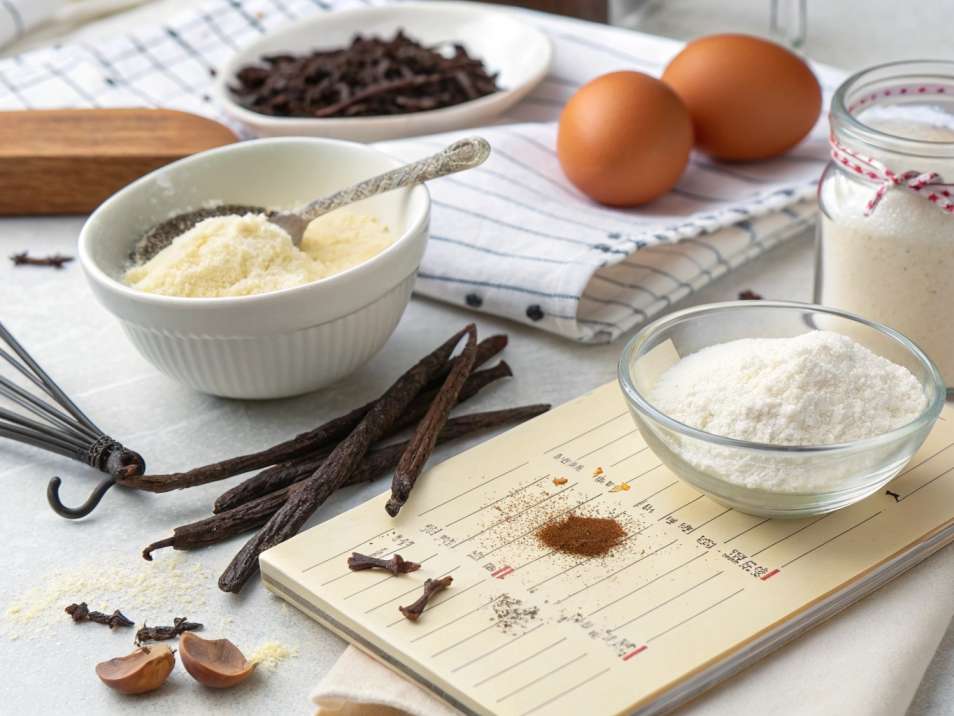
Here’s what you’ll need:
Main Ingredients
- 3–5 whole vanilla beans (the star of the show – soft, plump ones work best)
- ½ cup light corn syrup or glycerin (for a thick, smooth consistency)
- ¼ cup water (helps blend and balance the texture)
- 2 tablespoons of granulated sugar (optional, to add a hint of sweetness)
- 1 teaspoon lemon juice or a pinch of salt (to brighten and preserve)
- 1–2 teaspoons vanilla extract (optional, to deepen the flavor)
Notes & Tips
- Vanilla beans: Use Madagascar or Tahitian beans for a deep, floral flavor. If your beans are dry, soak them in warm water for 10 minutes before using.
- Glycerin vs. corn syrup: Glycerin creates a more natural, alcohol-free base, while corn syrup is a common choice for its smooth finish.
- Sweetener swap: Prefer a less processed option? Substitute sugar with honey or maple syrup for a subtle twist.
- Consistency tip: Want a thinner paste? Add a splash more water during blending
How to Make Vanilla Paste – Step-by-Step Instructions
Ready to turn those beautiful vanilla beans into something truly magical? Making your own vanilla paste recipe is easier than you might think, and the results are pure, spoonable gold. Let’s walk through it together.
What You’ll Need:
Clean glass jar for storage
Small saucepan
Sharp paring knife
Blender or food processor
Fine mesh strainer or cheesecloth (optional for smoother texture)
Step-by-Step Instructions
1. Split the Vanilla Beans
With a sharp knife, gently cut each vanilla bean open along its length. Scrape out the tiny black seeds inside—these are where the magic lives! Don’t toss the pods; we’ll use those too.Step-by-Step Instructions
2. Combine Everything in a Saucepan
In your saucepan, add:
- Scraped vanilla seeds and pods
- Water
- Corn syrup or glycerin
- Sugar (if using)
- Lemon juice or salt
Give it a gentle stir to combine.
3. Simmer Low and Slow
Leave the mixture on low heat until it boils. Let it bubble softly for about 5–7 minutes, just until everything is well blended and the vanilla infuses deeply. Stir occasionally and keep the heat low—you want infusion, not caramelization.
4. Cool, Blend, and Refine
Once slightly cooled, remove the pods and pour the mixture into a blender or food processor. Blend until smooth and glossy.
Want it extra silky? Strain the paste through a fine mesh sieve or cheesecloth. If you love seeing those gorgeous vanilla flecks, skip this step!
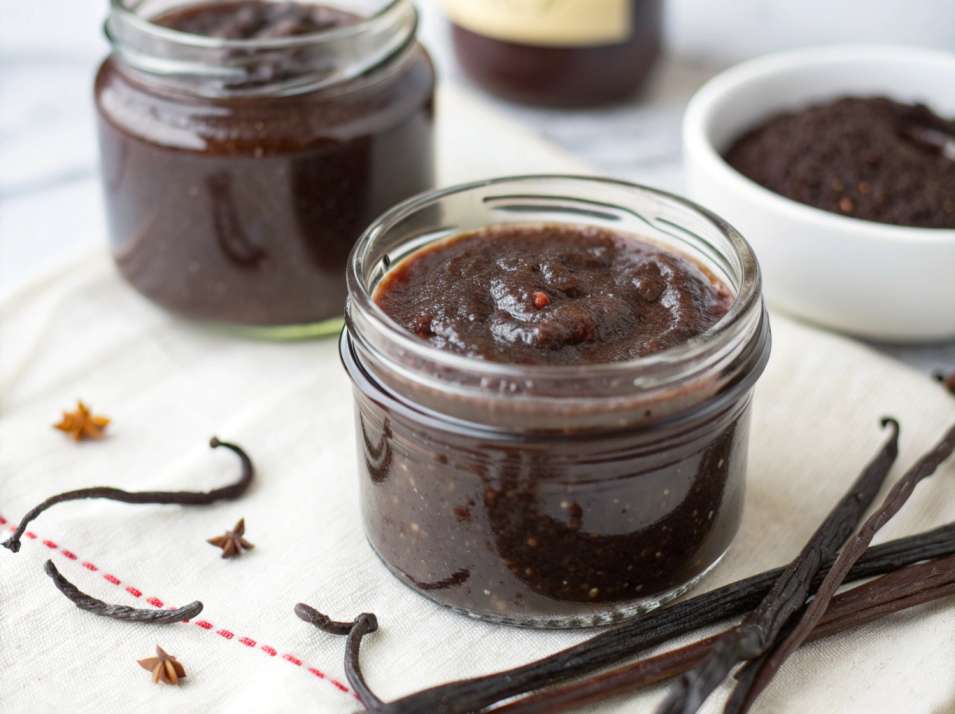
5. Bottle It Up
Spoon the paste into a clean glass jar or sealable airtight container. Let it cool completely before sealing. Store it in the fridge for up to 6 months—the flavor only gets better with time.
Pro Insight:
If the paste thickens too much in the fridge, a splash of warm water can loosen it right up. Prefer a more intense flavor? Let the vanilla pods soak in the jar for a few extra days before using.
And that’s it! With just a little time and a handful of pantry staples, you’ve made a luxurious, homemade vanilla bean paste—perfect for baking, gifting, or sneaking straight from the jar.
Pro Tips & Tasty Variations for Vanilla Paste
Now that you’ve nailed the basics of making your own vanilla paste recipe, let’s take it a step further. This section is where the fun really begins—because part of the joy in DIY kitchen creations is making them your own. Whether you’re adjusting for dietary needs or enhancing flavor, there’s plenty of room to personalize.
Pro Tips for Success
- Use quality vanilla beans.
The better the bean, the bolder the flavor. Look for plump, oily pods—dry or brittle beans often lack intensity. - Don’t toss the pods.
Even after scraping, vanilla pods hold loads of flavor. Mix them in, or dry them and add to sugar to create homemade vanilla sugar. for homemade vanilla sugar. - Taste and tweak.
Want it sweeter? Add more sugar or a drizzle of honey. Prefer bold, earthy notes? Let the paste sit a day or two before using—time enhances depth. - Watch your consistency.
If your paste is too thick, blend in a teaspoon of warm water. Too thin? Let it simmer gently for a few more minutes to thicken and reduce. - Sanitize your jar.
Always store your vanilla paste in a clean, airtight glass container to extend shelf life and keep flavors fresh.
Variations to Try
- Alcohol-Free Version:
Skip the vanilla extract and stick to glycerin or corn syrup for a completely alcohol-free, kid-friendly option. - Maple or Honey Twist:
Swap out the sugar for pure maple syrup or honey to add a hint of natural sweetness with extra character. - Citrus-Infused Vanilla Paste:
Add a small strip of lemon or orange zest during simmering for a bright, citrusy lift—perfect for summer bakes and fruit-based desserts. - Spiced Vanilla Blend:
Stir in a pinch of cinnamon, cardamom, or clove to create a cozy, spiced variation ideal for holiday baking.
Serving Suggestions : Delicious Ways to Use Vanilla Paste
So you’ve made your own vanilla paste—now what? This fragrant, flavor-packed ingredient is incredibly versatile, and once you start using it, you’ll find endless excuses to add a spoonful (or two) to your favorite recipes.
Think of it as your secret weapon in the kitchen—a little goes a long way, and the depth it adds is seriously next level.
Baking Favorites
Use vanilla paste anywhere you’d normally use extract, but with more visual flair and flavor impact:
- Cookies – From chocolate chip to shortbread, just ½ to 1 teaspoon gives them that bakery-style boost.
- Cakes & Cupcakes – Elevate vanilla, lemon, or almond cake recipes with real vanilla bean specks.
- Muffins & Quick Breads – Try it in banana bread or blueberry muffins for a warm, aromatic twist.
Sweet Treats & Desserts
This is where vanilla paste really shines:
- Ice Cream & Gelato – Add to your base for authentic, creamy vanilla flavor.
- Custards, Puddings & Crème Brûlée – The texture and richness of paste make it perfect for smooth desserts.
- Buttercream & Frostings – It blends beautifully without thinning your mix.
Drinks & Breakfast Boosts
Don’t limit vanilla paste to baking—it can make your everyday sips and bites more special:
- Lattes & Hot Chocolate – Stir a tiny bit into warm drinks for a cozy, café-style finish.
- Smoothies & Shakes – A teaspoon adds richness to fruit or chocolate blends.
- Yogurt, Oats & Chia Pudding – Mix into your morning bowl for a sweet upgrade.
Creative Extras
Once you start playing, you’ll find new ways to use it all the time:
- DIY Vanilla Sugar – Stir into a jar of sugar and let it infuse for vanilla-flavored sweetener.
- Whipped Cream – A small dab gives homemade whipped cream a gourmet edge.
- Gifting – Pour into mini jars, tie with a ribbon, and share the love—homemade vanilla bean paste makes a thoughtful foodie gift.
________________________________________________________________________________
__________________________________________________________________
vanilla paste recipe
Ingredients
Main Ingredients
- 3 –5 whole vanilla beans the star of the show – soft, plump ones work best
- ½ cup light corn syrup or glycerin for a thick, smooth consistency
- ¼ cup water helps blend and balance the texture
- 2 tablespoons granulated sugar optional, for a touch of sweetness
- 1 teaspoon lemon juice or a pinch of salt to brighten and preserve
- 1 –2 teaspoons vanilla extract optional, to deepen the flavor
Instructions
What You’ll Need:
- Clean glass jar for storage
- Small saucepan
- Sharp paring knife
- Blender or food processor
- Fine mesh strainer or cheesecloth (optional for smoother texture)
Split the Vanilla Beans
- Using a sharp knife, carefully slice each vanilla bean lengthwise. Scrape out the tiny black seeds inside—these are where the magic lives! Don’t toss the pods; we’ll use those too.Step-by-Step Instructions
Combine Everything in a Saucepan
- Scraped vanilla seeds and pods
- Water
- Corn syrup or glycerin
- Sugar (if using)
- Lemon juice or salt
- Give it a gentle stir to combine.
Simmer Low and Slow
- Leave the mixture on low heat until it boils. Let it bubble softly for about 5–7 minutes, just until everything is well blended and the vanilla infuses deeply. Stir occasionally and keep the heat low—you want infusion, not caramelization.
Cool, Blend, and Refine
- Once slightly cooled, remove the pods and pour the mixture into a blender or food processor. Blend until smooth and glossy.
- Want it extra silky? Strain the paste through a fine mesh sieve or cheesecloth. If you love seeing those gorgeous vanilla flecks, skip this step!
Bottle It Up
- Transfer the paste into a clean glass jar or airtight container. Let it cool completely before sealing. Store it in the fridge for up to 6 months—the flavor only gets better with time.
Notes
- Calories: 22 kcal
- Fat: 0 g
- Saturated Fat: 0 g
- Carbohydrates: 6 g
- Sugar: 5 g
- Protein: 0 g
- Fiber: 0 g
- Sodium: 1 mg
Conclusion – Why You’ll Love Homemade Vanilla Paste
There’s something truly rewarding about making your own vanilla paste—a sense of control, creativity, and pure flavor that no store-bought version can match. With just a few ingredients and a bit of care, you’ve created a kitchen staple that’s as beautiful as it is delicious.
Here’s Why It’s a Keeper:
- Better flavor: Rich, bold, and aromatic thanks to real vanilla beans.
- Versatile use: Perfect for baking, beverages, and everyday treats.
- Customizable: Tailor the sweetness, consistency, and ingredients to your liking.
- Clean and natural: No artificial additives—just pure vanilla goodness.
- Budget-friendly: A smart, long-term alternative to expensive commercial options.
Whether you’re a seasoned baker or just getting comfortable in the kitchen, this DIY vanilla bean paste brings a touch of elegance to your creations—and a little joy to your process. It’s a small act of culinary self-care that pays off in every bite.
Now that you’ve got your own jar of sweet, speckled magic, the only question left is: what will you make first?
FAQs – Your Vanilla Paste Questions, Answered
Let’s wrap up with answers to some of the most common questions about making and using homemade vanilla paste. Whether you’re troubleshooting or just curious, these tips will help you get the most from every bean.
1. What’s the difference between vanilla paste, extract, and vanilla beans
Vanilla extract is liquid and alcohol-based, made by soaking beans in alcohol.
Vanilla beans are the whole pods—scraped or used whole.
Vanilla paste combines both: real vanilla bean seeds suspended in a thick, sweet base. It’s rich, flavorful, and gives you that signature speckled look.
2. Can I substitute vanilla paste for extract in recipes?
Absolutely! Use 1:1 ratio—1 teaspoon of vanilla paste for every teaspoon of extract. The flavor is more intense, so you may even prefer using a bit less depending on the dish
3. How long does homemade vanilla paste last?
When stored properly in a sterile, airtight glass jar in the fridge, it can last up to 6 months. Always use clean utensils to scoop it out, and keep an eye (and nose!) out for any changes in smell or texture.
4. Can I make vanilla paste without corn syrup?
Yes! You can substitute it with vegetable glycerin, honey, or even maple syrup for a more natural base. Each will slightly affect the taste and consistency, but all work beautifully.
5. Why is my vanilla paste too thick or too runny?
Too thick? Stir in a small amount of warm water or vanilla extract to loosen.
Too runny? Return it to a saucepan and simmer gently until it thickens.
6. Where can I buy quality vanilla beans?
Look for reputable spice shops or online sources that offer grade A or B Madagascar, Tahitian, or Mexican vanilla beans. They should be soft, pliable, and aromatic—not brittle or dried out.