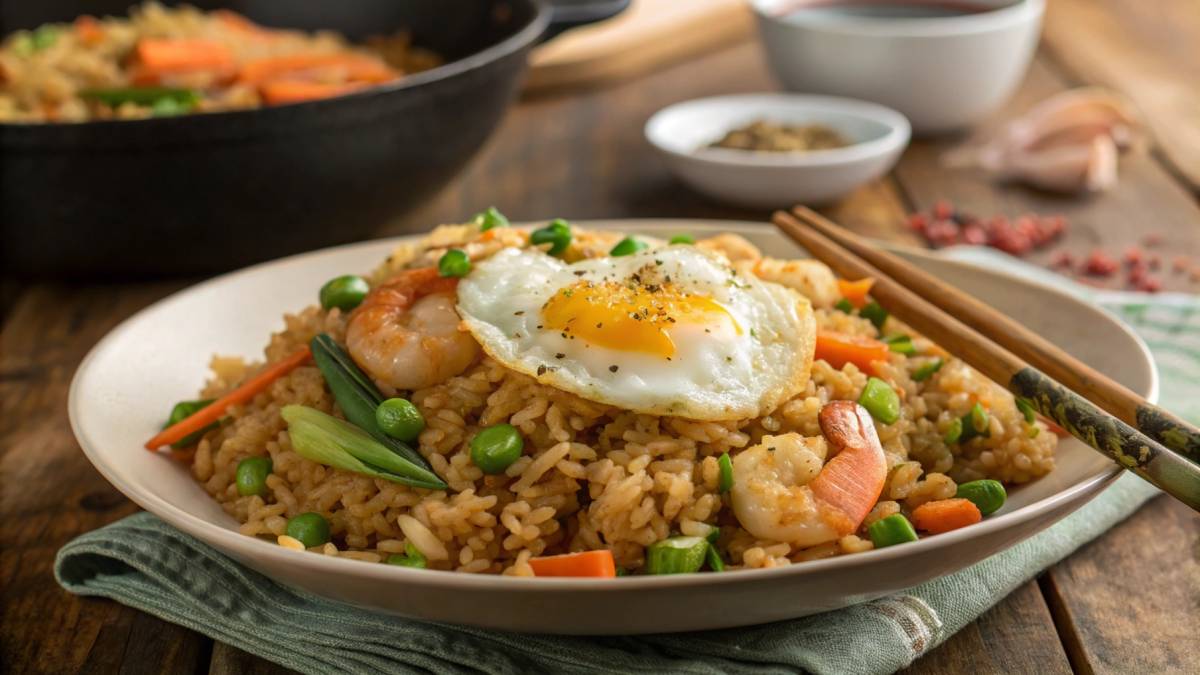
Craving takeout-style fried rice but want something faster—and fresher—than delivery? Say hello to your new addictive weeknight hero! This crispy, golden fried rice comes together in just 20 minutes, using simple ingredients (yes, day-old rice is the secret!). Whether you’re repurposing leftovers or whipping up a quick meal that beats any restaurant, this recipe is endlessly customizable—toss in shrimp, tofu, or extra veggies, and don’t forget the sizzle of soy sauce and sesame oil for that umami punch. Ready to turn your kitchen into a fried rice heaven? Let’s get wok-ing!
(P.S. Skip the soggy rice disasters—I’ve packed this with pro tips for perfect texture every time!)
Table of Contents
Table of Contents
Key Benefits: Why This Fried Rice Will Become Your Weeknight Obsession
Let’s be real—fried rice is the ultimate kitchen savior. It’s the quick-fix dinner that feels indulgent, the clean-out-the-fridge genius move, and the guaranteed crowd-pleaser. Here’s why this dish deserves a regular spot in your lunch lineup:
Faster Than Takeout
20 minutes is all you need—less time than waiting for delivery! High-heat cooking locks in flavor while keeping veggies crisp-tender.
Endlessly Adaptable
Got leftover chicken? Toss it in. Vegan? Swap in tofu. Kid-friendly? Skip the chili flakes. This recipe bends to your cravings and pantry.
Leftover Magic
That sad takeout rice from last night? It’s the secret weapon for perfect texture. Day-old rice fries up crispy, not mushy.
Budget-Friendly Brilliance
A handful of cheap staples (eggs, carrots, soy sauce) transform into a meal that tastes luxe. No fancy ingredients required!
Pro Insight: Forgot to plan ahead? Spread fresh rice on a tray and chill for 15 minutes to mimic day-old texture.
Ready to make fried rice your new weeknight addiction? Let’s grab that wok!
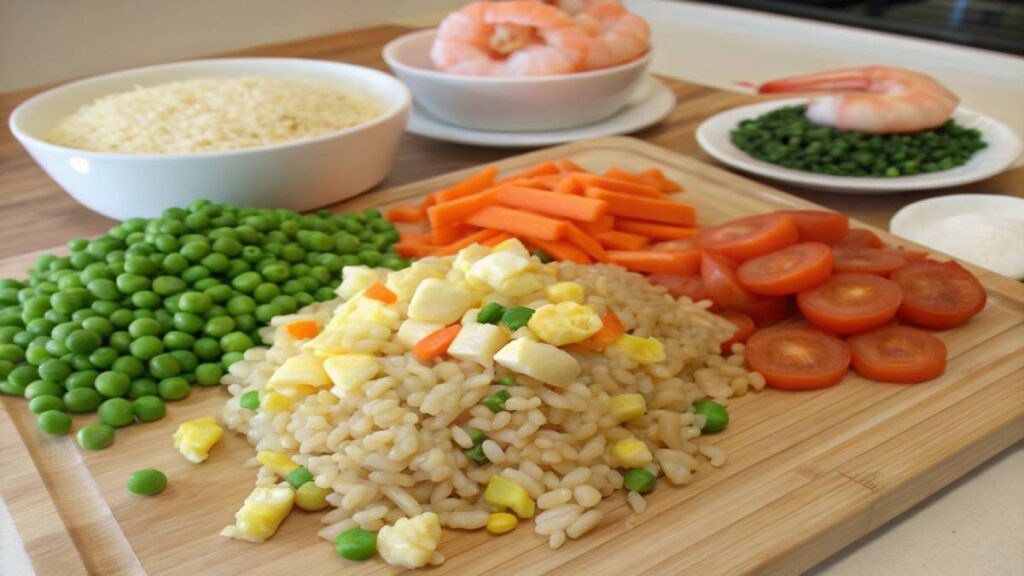
Ingredients: Your Fried Rice Toolkit (Pantry to Fridge!)
Let’s raid your kitchen—chances are, you’ve got most of this already! These simple ingredients create big flavor magic when they hit the hot wok. Here’s your grocery list (with smart swaps!):
The Essentials
- 3 cups day-old jasmine rice (or any long-grain rice)
Why? Fresh rice steams instead of frying—day-old = perfect texture! - 2 tbsp neutral oil (peanut, canola, or avocado)
Pro Tip: High smoke point = better sear without burning - 2 eggs, beaten (or tofu scramble for vegan)
- 3 cloves garlic, minced (jarred works in a pinch!)
- 1 tablespoon of freshly grated ginger (or 1/2 teaspoon of ground ginger as a shortcut)
The Flavor Boosters
- 3 tbsp soy sauce (or tamari for GF)
Watch the salt: Low-sodium soy sauce lets you control seasoning - 1 tbsp sesasme oil (added at the end for aromatic punch!)
- 1 tsp rice vinegar (or lime juice for brightness)
The Mix-Ins (Pick Your Adventure!)
- 1 cup veggies: diced carrots, peas, bell peppers
Budget Hack: Frozen veggies work great—no chopping! - 2 sliced green onions (reserve the green tops for garnish)
- Protein options: 1 cup diced chicken, shrimp, or crumbled tofu
Optional Upgrades
- 1 tsp chili crisp (for heat lovers)
- 1/4 cup crispy shallots (game-changing crunch!)
- 1 tbsp fish sauce (next-level umami)
Shopping Shortcut: Grab a pre-chopped stir-fry veggie mix to save 10 minutes!
Instructions: Wok Your Way to Fried Rice Perfection
Let’s transform those ingredients into restaurant-quality fried rice! Follow these steps for crispy, flavorful results every time:

Pro Tip Before You Start:
Have all ingredients prepped and within arm’s reach—stir-frying moves fast!
1. Prep Your Rice
- Break up cold rice with wet hands to prevent clumping
- Secret Trick: Lightly spray rice with water before frying to revive texture
2. Heat the Wok/Skillet
- Heat 1 tablespoon of oil in a wok or large skillet over high heat until it begins to shimmer.
- Test the heat: Add a grain of rice—it should sizzle immediately
3. Cook the Eggs
- Add beaten eggs, let set for 5 seconds, then scramble until just set
- Remove from wok and set aside
4. Build Flavor Base
- Add remaining 1 tbsp oil
- Sauté garlic and ginger for 15 seconds until fragrant (don’t burn!)
- Toss in hardy veggies (carrots, peppers) first, cook 1 minute
5. Fry the Rice
- Add rice, pressing into pan to maximize contact
- Let sit undisturbed for 30 seconds to develop crispy bits
- Toss and repeat 2-3 times for perfect texture
6. Bring It All Together
- Reduce heat to medium
- Add soy sauce around the edges (it’ll caramelize on the hot pan)
- Return eggs, add tender veggies (peas, green onions)
- Drizzle sesame oil, toss to combine
7. Final Touches
- Taste and adjust: More soy sauce? Splash of vinegar?
- Garnish with extra green onions and crispy shallots if using
Pro Techniques for Next Level Results:
- Wok hei magic: Let rice char slightly for authentic smoky flavor
- Layered seasoning: Add half the soy sauce while frying, rest at the end
- Texture control: More tossing = uniform texture, less tossing = crispy bits
Timing is Everything:
Total cook time: 8-10 minutes max—overcooking makes rice mushy!
(Coming Next: Clever variations to make this recipe your own!)
Pro Tips & Variations: Make This Fried Rice Uniquely Yours
Now that you’ve mastered the basics, let’s take your fried rice game to the next level! These expert tweaks and creative spins will keep this recipe exciting every time you make it.
Pro Tips for Perfect Results
✔ Rice Revival Hack – If your rice is too dry, sprinkle 1 tsp water per cup and microwave for 15 seconds before frying.
✔ No-Stick Secret – Swirl oil in a hot wok until shimmering, then pour it out and add fresh oil. This creates a non-stick surface!
✔ Umami Boost – Add 1 tsp fish sauce or ½ tsp MSG for deeper flavor (don’t knock it till you try it!).
✔ Crispy Bits Trick – Press rice firmly into the pan and resist stirring for 30-second intervals to maximize crunch.
Flavor Variations (Pick Your Mood!)
Spicy Kimchi Fried Rice – Swap veggies for 1 cup chopped kimchi + 1 tbsp gochujang. Top with a runny fried egg!
Tropical Pineapple Fried Rice – Add ½ cup diced pineapple, cashews, and a dash of curry powder.
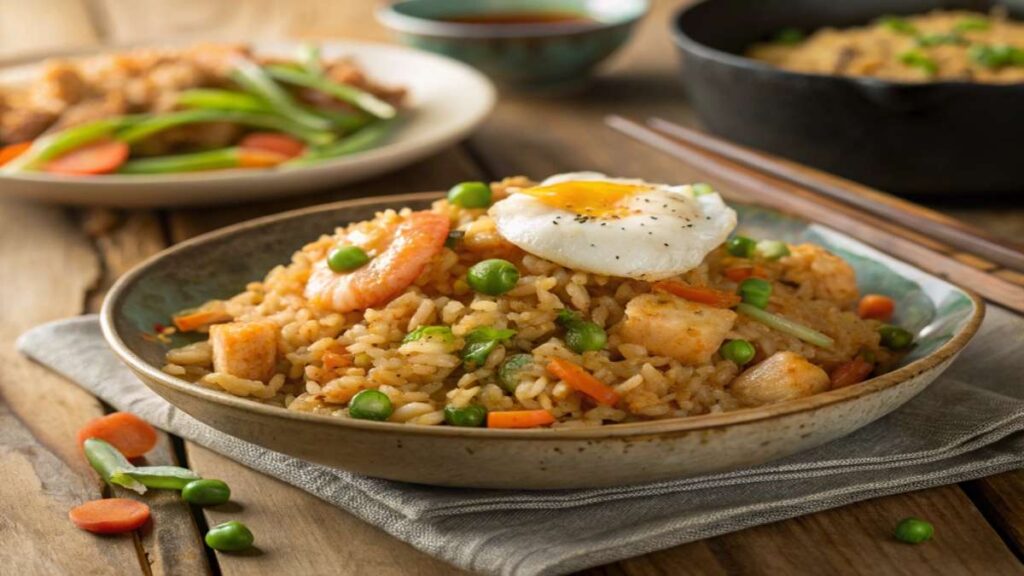
Restaurant-Style Shrimp Fried Rice – Sear shrimp separately first, then fold in at the end for plump, juicy bites.
Vegan Deluxe – Use tofu scramble instead of eggs + a splash of liquid aminos for extra savoriness.
Dietary Swaps
• Gluten-Free → Tamari or coconut aminos instead of soy sauce
• Low-Carb → Cauliflower rice (squeeze out moisture first!)
• Extra Protein → Add edamame or diced ham
Pro Move: Double the batch and refrigerate half—fried rice reheats beautifully for meal prep!
Serving Suggestions: How to Turn Your Fried Rice into a Feast
Your golden, crispy fried rice deserves a starring role! Here’s how to plate it like a pro and pair it with dishes that’ll make your meal unforgettable.
Presentation Perfection
✨ Garnish Galore – Top with:
• Extra sliced green onions for freshness
• Toasted sesame seeds for nutty crunch
• A drizzle of sriracha mayo for creamy heat
• Crispy fried shallots or garlic chips for texture
The Runny Egg Trick – Crown your rice with a sunny-side-up egg—that rich yolk transforms it into luxury!
Perfect Pairings
Classic Combo:
• Egg drop soup (5-minute version!)
• Steamed dumplings or spring rolls
Vibrant Veggie Sides:
• Quick-pickled cucumbers (slice + toss with rice vinegar, sugar, and salt)
• Garlicky sautéed bok choy
For the Ultimate Takeout-at-Home Experience:
• Pair with a cold Asian lager or jasmine tea
• Add store-bought chili crisp for extra kick
Meal Prep Magic
• Store cooled rice in airtight containers for up to 3 days
• Reheat in a skillet with 1 tsp oil to revive crispiness (microwave makes it soggy!)
• Freeze individual portions for up to 1 month—perfect for quick lunches
Pro Tip: Serve in a hollowed-out pineapple for a fun tropical twist at parties!
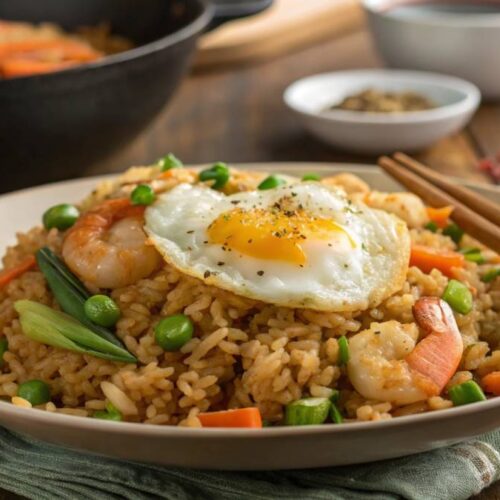
fried rice
Ingredients
The Essentials
- 3 cups day-old jasmine rice or any long-grain rice
- Why? Fresh rice steams instead of frying—day-old = perfect texture!
- 2 tbsp neutral oil peanut, canola, or avocado
- Pro Tip: High smoke point = better sear without burning
- 2 eggs beaten (or tofu scramble for vegan)
- 3 cloves garlic minced (jarred works in a pinch!)
- 1 tablespoon of freshly grated ginger or 1/2 teaspoon of ground ginger as a shortcut
The Flavor Boosters
- 3 tbsp soy sauce or tamari for GF
- Watch the salt: Low-sodium soy sauce lets you control seasoning
- 1 tbsp sesasme oil added at the end for aromatic punch!
- 1 tsp rice vinegar or lime juice for brightness
- The Mix-Ins Pick Your Adventure!
- 1 cup veggies: diced carrots peas, bell peppers
- Budget Hack: Frozen veggies work great—no chopping!
- 2 sliced green onions reserve the green tops for garnish
- Protein options: 1 cup diced chicken shrimp, or crumbled tofu
Optional Upgrades
- 1 tsp chili crisp for heat lovers
- 1/4 cup crispy shallots game-changing crunch!
- 1 tbsp fish sauce next-level umami
Instructions
Pro Tip Before You Start:
- Have all ingredients prepped and within arm’s reach—stir-frying moves fast!
Prep Your Rice
- Break up cold rice with wet hands to prevent clumping
- Secret Trick: Lightly spray rice with water before frying to revive texture
Heat the Wok/Skillet
- Heat 1 tablespoon of oil in a wok or large skillet over high heat until it begins to shimmer.
- Test the heat: Add a grain of rice—it should sizzle immediately
Cook the Eggs
- Add beaten eggs, let set for 5 seconds, then scramble until just set
- Remove from wok and set aside
Build Flavor Base
- Add remaining 1 tbsp oil
- Sauté garlic and ginger for 15 seconds until fragrant (don’t burn!)
- Toss in hardy veggies (carrots, peppers) first, cook 1 minute
Fry the Rice
- Add rice, pressing into pan to maximize contact
- Let sit undisturbed for 30 seconds to develop crispy bits
- Toss and repeat 2-3 times for perfect texture
Bring It All Together
- Reduce heat to medium
- Add soy sauce around the edges (it’ll caramelize on the hot pan)
- Return eggs, add tender veggies (peas, green onions)
- Drizzle sesame oil, toss to combine
Final Touches
- Taste and adjust: More soy sauce? Splash of vinegar?
- Garnish with extra green onions and crispy shallots if using
________________________________________________________________________________
_____________________________________________________________
Conclusion: Your New Go-To Fried Rice Masterpiece
Congratulations—you’ve just unlocked the secret to restaurant-quality fried rice at home! Whether you whipped this up for a quick weeknight dinner, meal-prepped for the week, or impressed guests with your wok skills, this recipe is your ticket to easy, flavorful wins anytime.
Why You’ll Keep Coming Back to This Recipe:
Foolproof flexibility – Swap proteins, veggies, or sauces to match your mood
Faster than delivery – 20 minutes to crispy, crave-worthy results
Leftover magic – Transforms random fridge bits into something extraordinary
FAQs: Your Fried Rice Questions Answered
Got burning questions? I’ve got answers! Here are solutions to the most common fried rice dilemmas:
My rice turned out mushy—help!
Always use cold, day-old rice (fresh rice steams instead of frying). Spread fresh-cooked rice on a tray to cool quickly in the fridge.
How do I prevent clumpy rice?
Pro Tip: Break up cold rice with wet hands or a fork before cooking. A few drops of water while frying can help separate grains.
My fried rice tastes bland—what did I miss?
Solutions:
• Bloom garlic/ginger in oil first (30 seconds)
• Add soy sauce around the hot pan edges for caramelization
• Finish with sesame oil + rice vinegar for brightness
When should I add meat/veggies?
Cook proteins first, remove, then add back at the end. Hard veggies (carrots) go early; tender ones (peas) last minute.